Lambda는 서버를 따로 두지 않고도 코드를 실행할 수 있는 이벤트 중심의 서비스입니다. 작은 단위의 API를 만들고 싶은데 EC2 인스턴스를 생성하기에는 규모와 비용이 너무 커지기 때문에 간편하게 코드를 작성하고 업로드하면 API 사용이 가능합니다! 비용도 사용한 만큼만 지불하면 되기 때문에 너무 좋은 서비스라고 생각합니다.
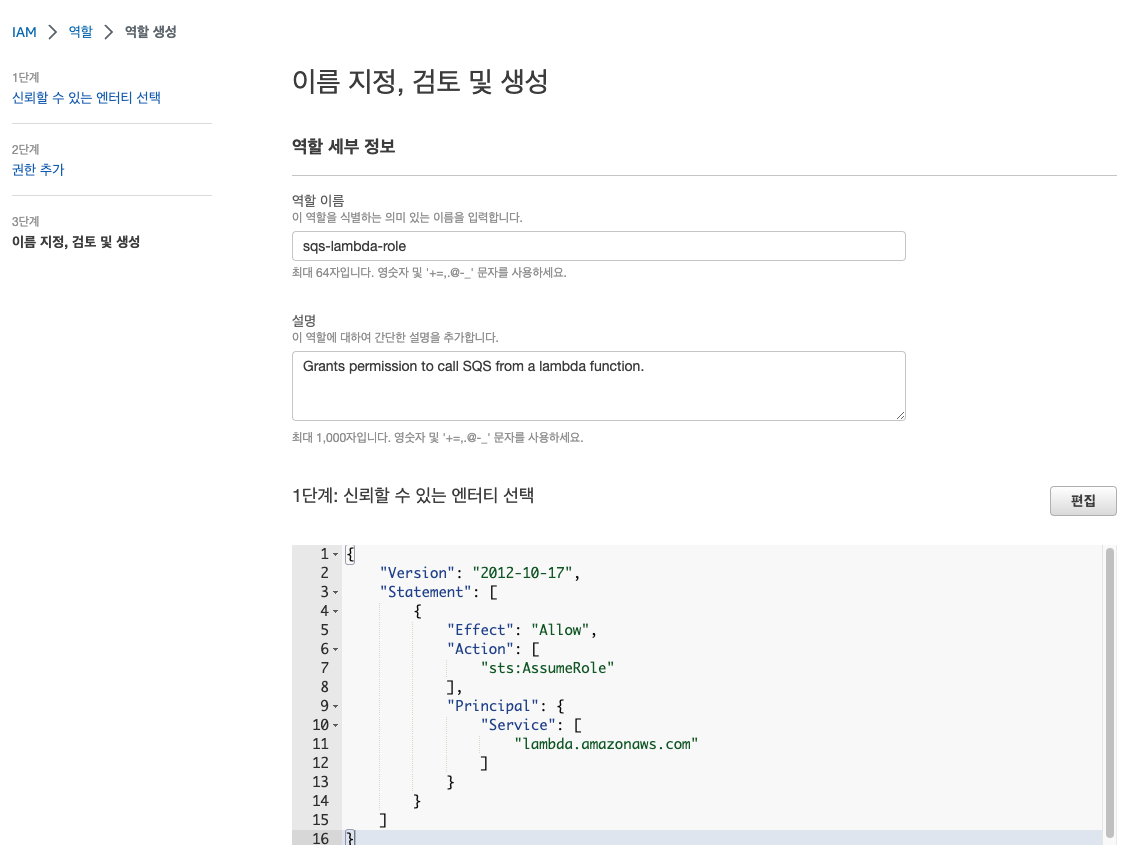
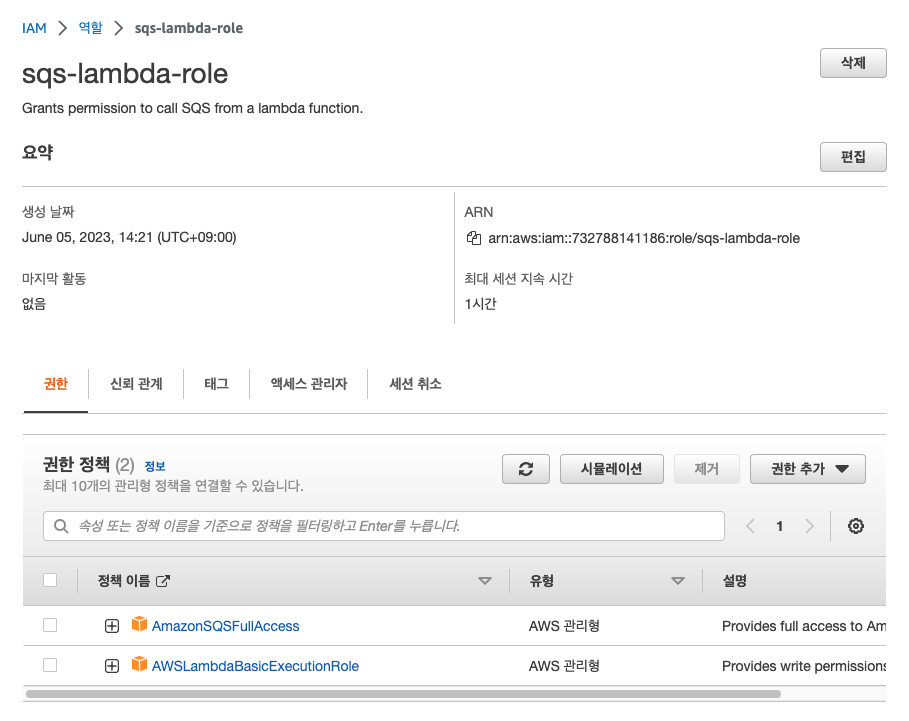
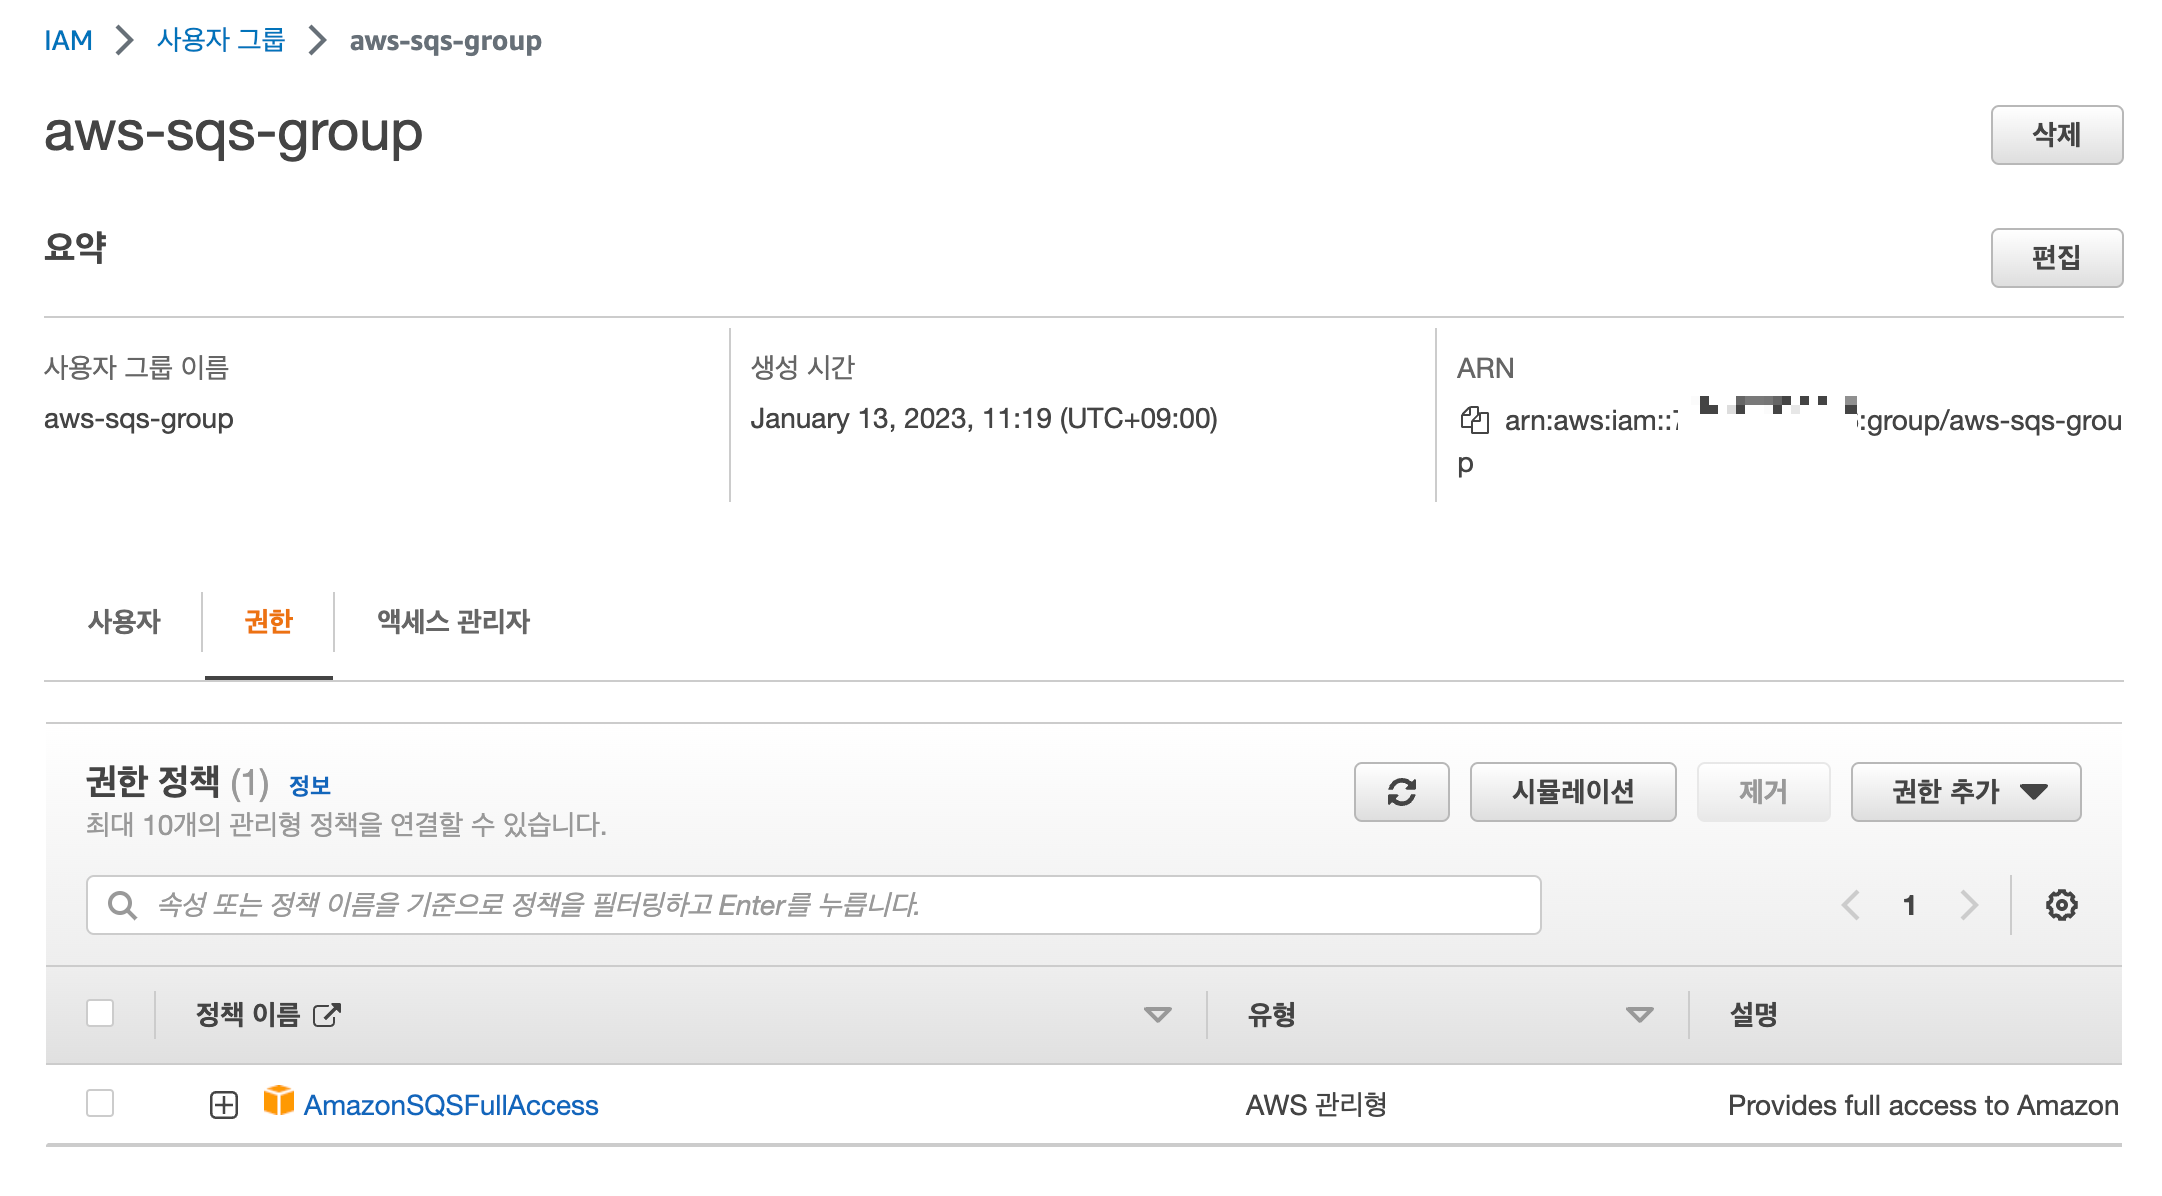
1. IAM 역할 생성
Lambda를 호출할 수 있는 권한을 가진 IAM을 생성해 줍니다. SQSFullAccess 권한과 LambdaBasicExecutionRole 권한을 넣어줍니다.
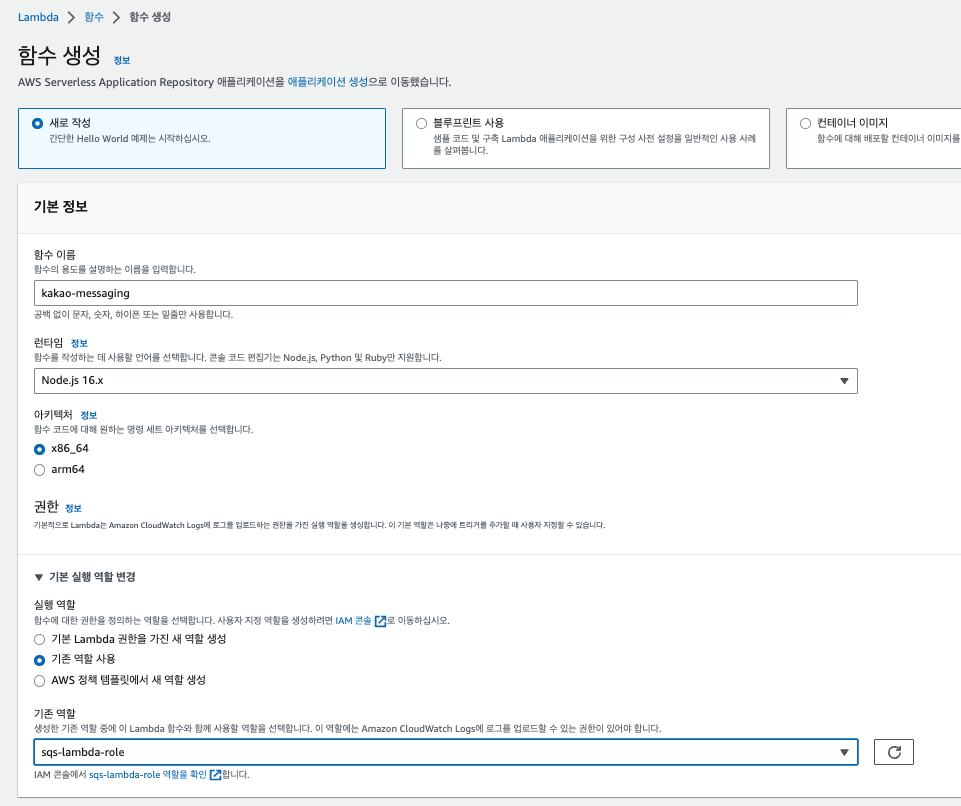
2. Lambda 함수 생성
이름과 함수를 어떤 언어로 작성할 것인지 고르고 실행 역할에는 기존 역할 사용을 클릭한 후 방금 생성해 준 역할을 선택해 줍니다. kakao-messaging이라는 이름으로 생성해 볼게요!
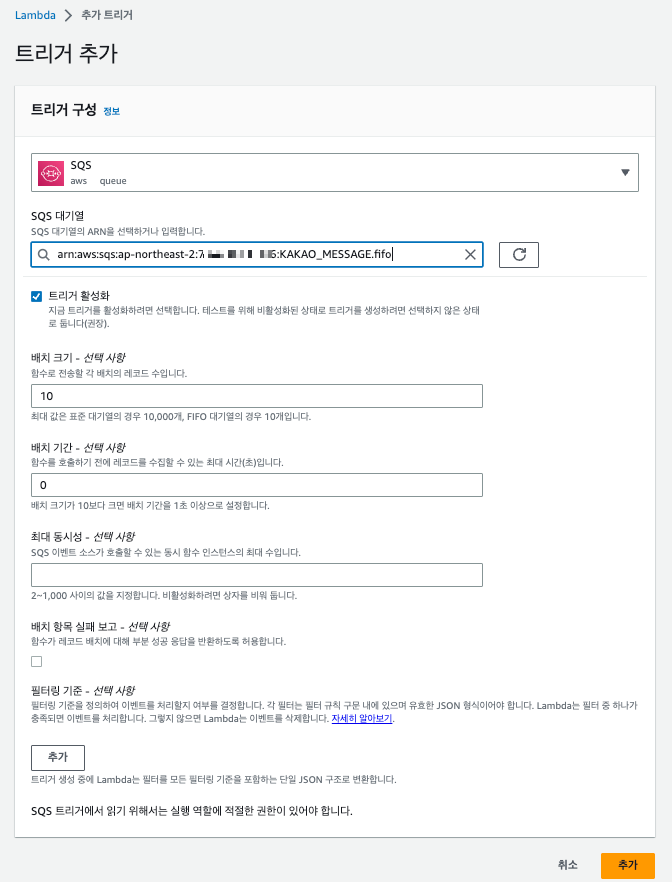
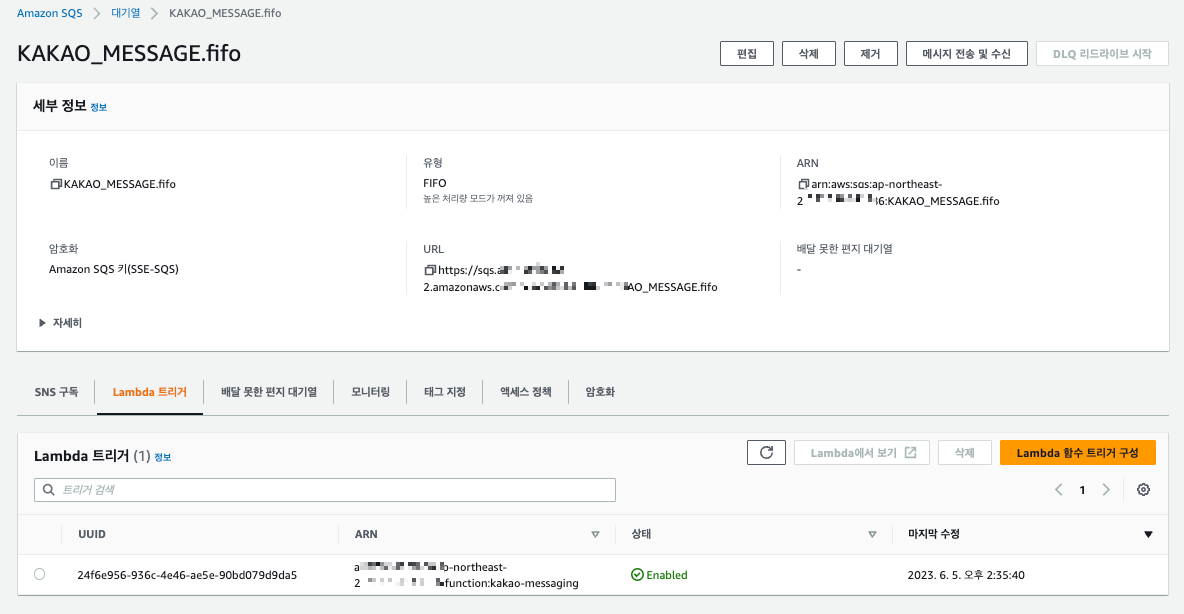
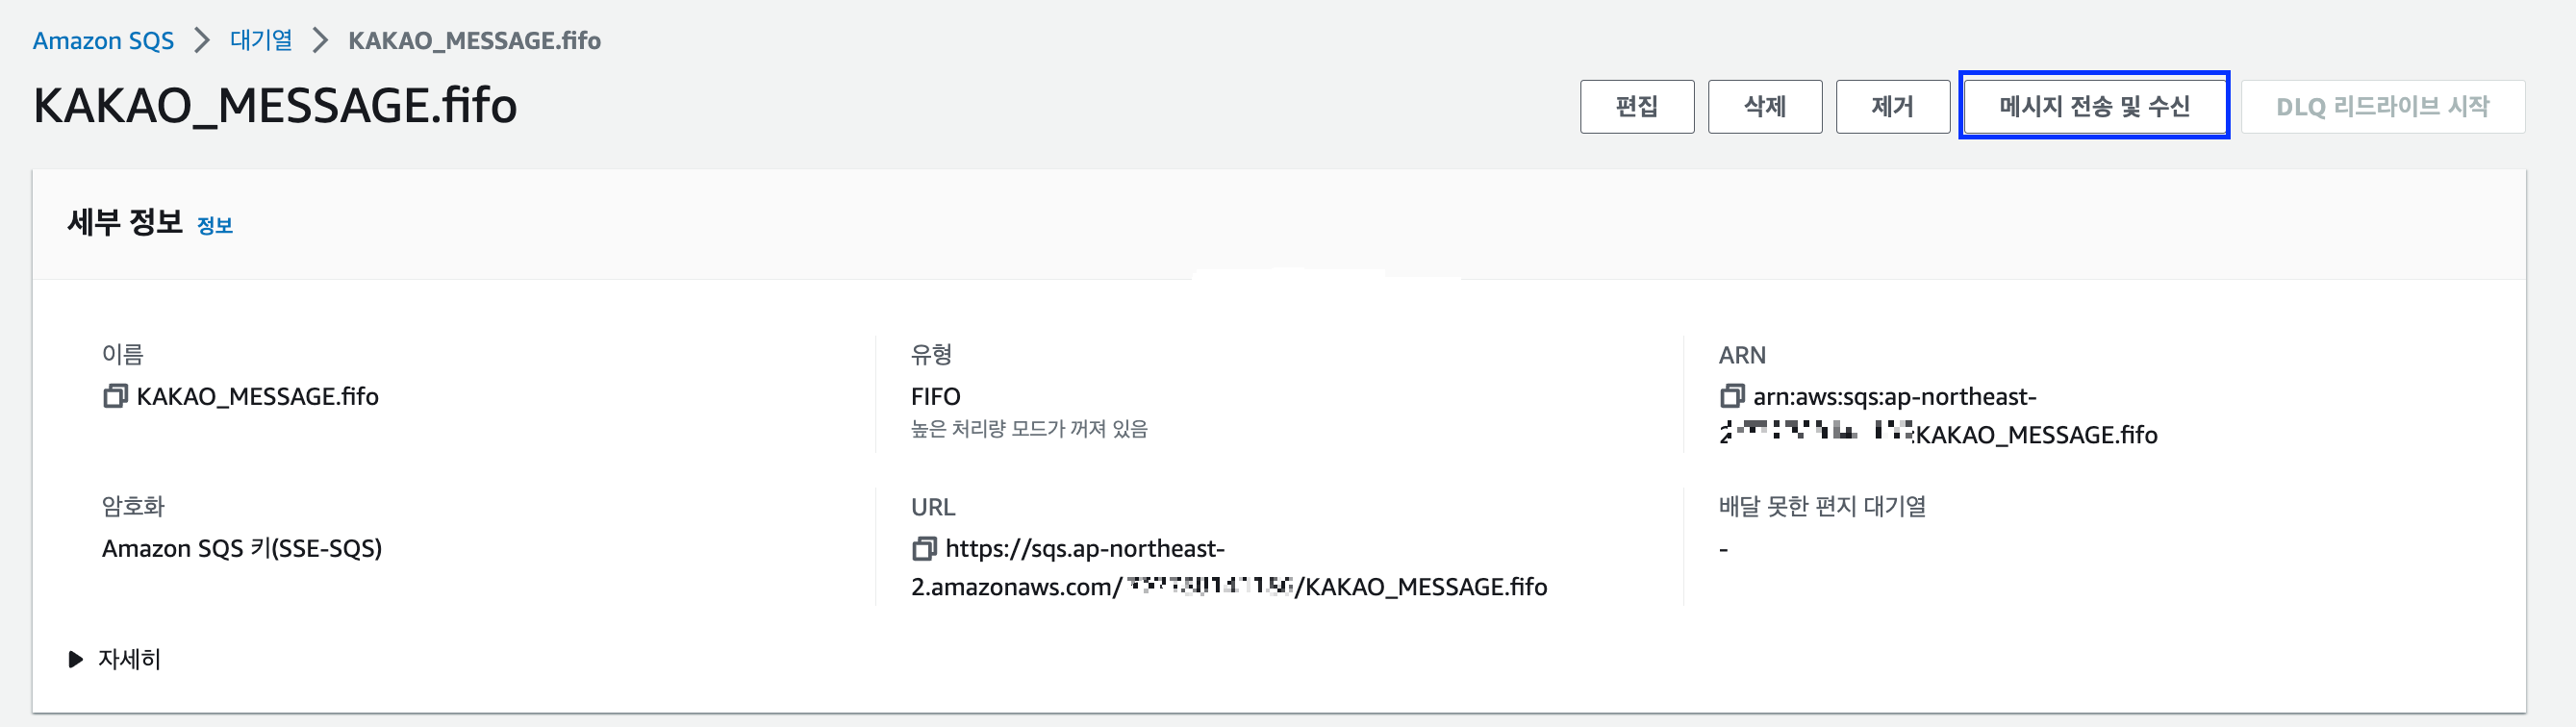
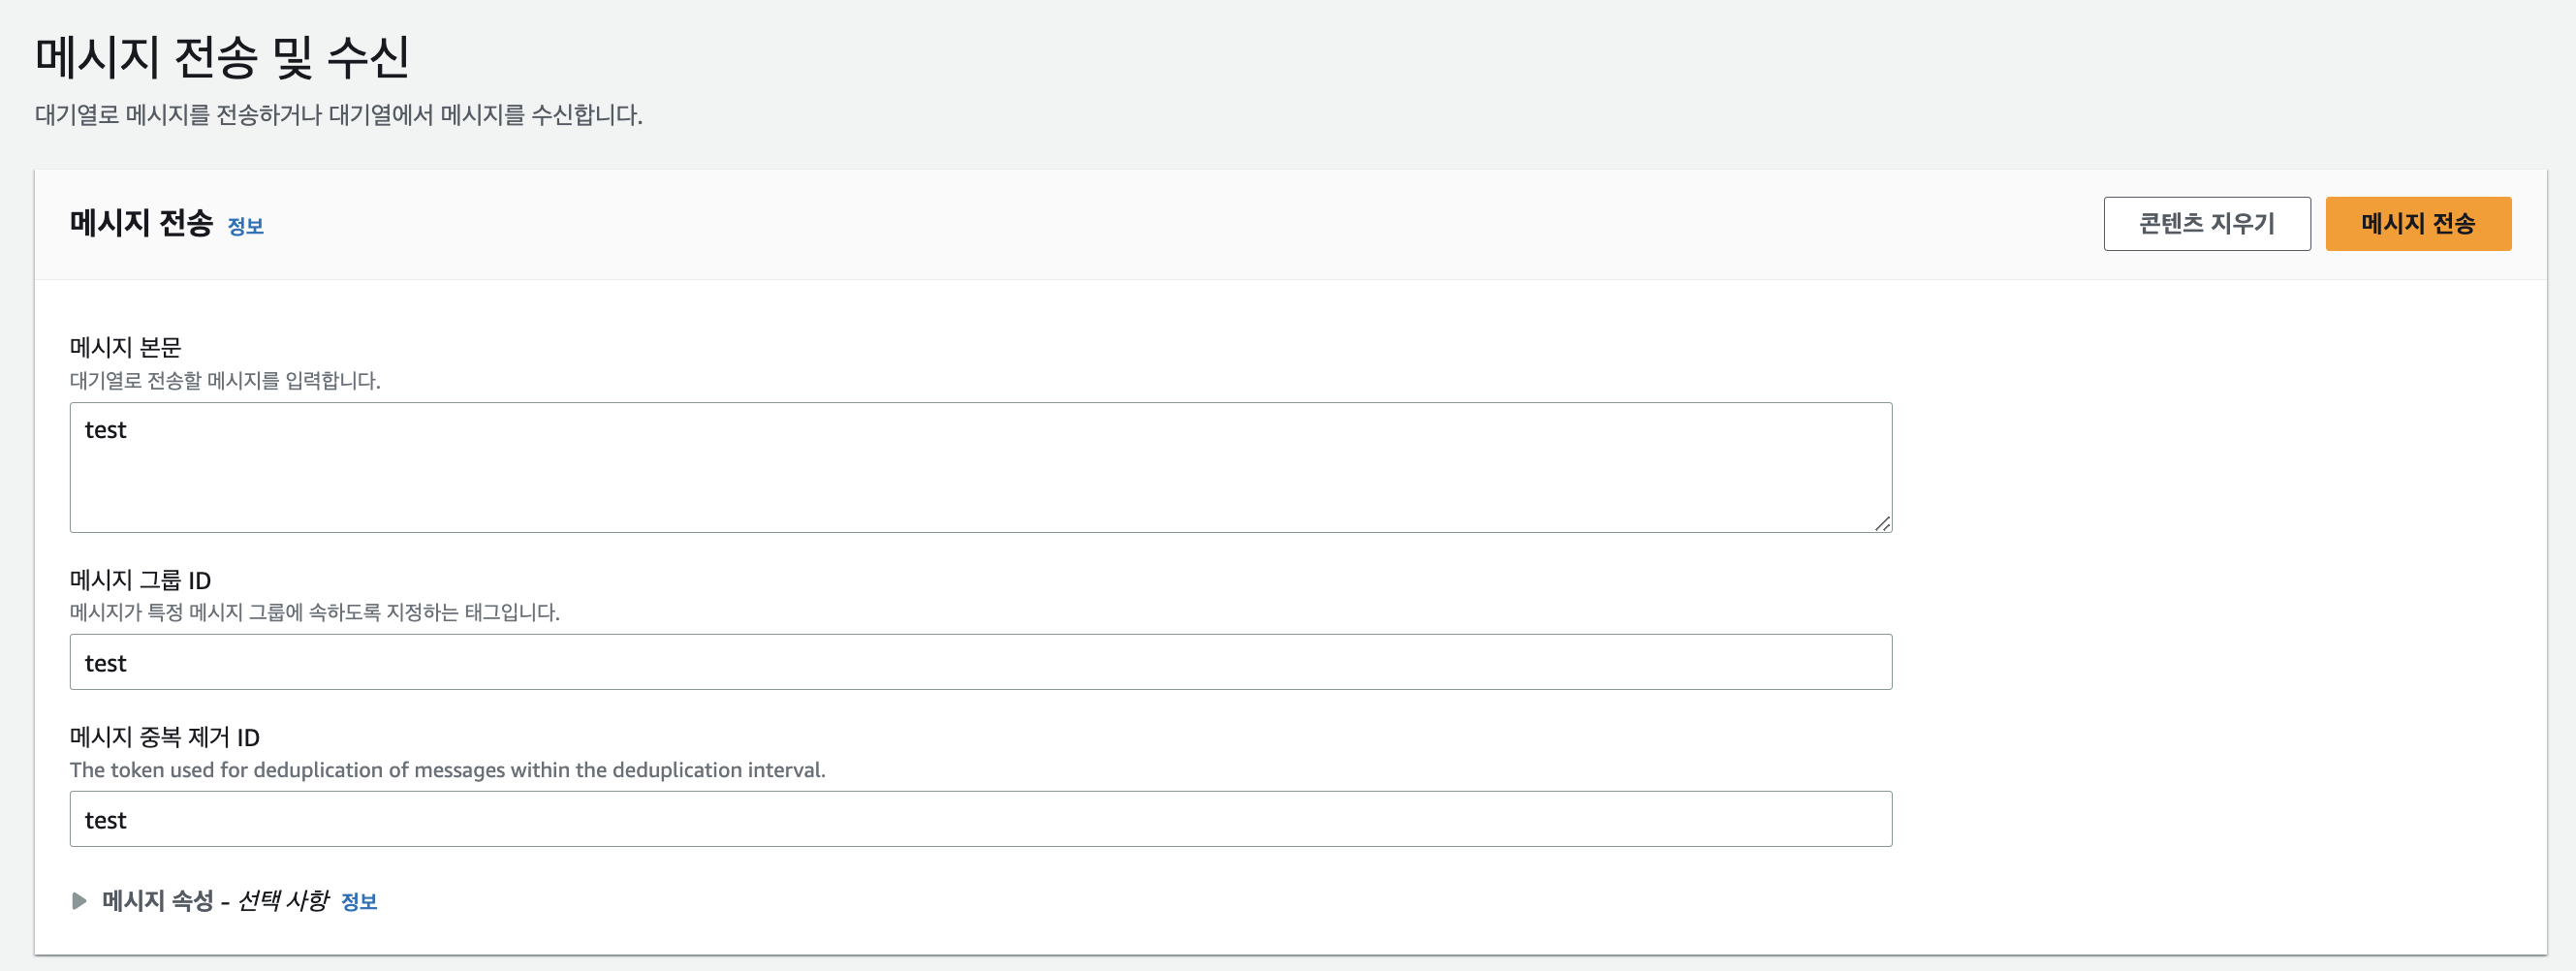
3. Lambda 트리거 구성
Lambda에 SQS 트리거를 추가해 줍니다! 트리거에 추가된 SQS에 쌓일 때마다 Lambda가 실행됩니다.
트리거가 생겼습니다!
4. Lambda 환경변수 추가
이 부분은 자유이지만 저는 환경변수를 생성해서 코드를 작성해 보도록 하겠습니다! 구성 > 환경 변수 > 편집
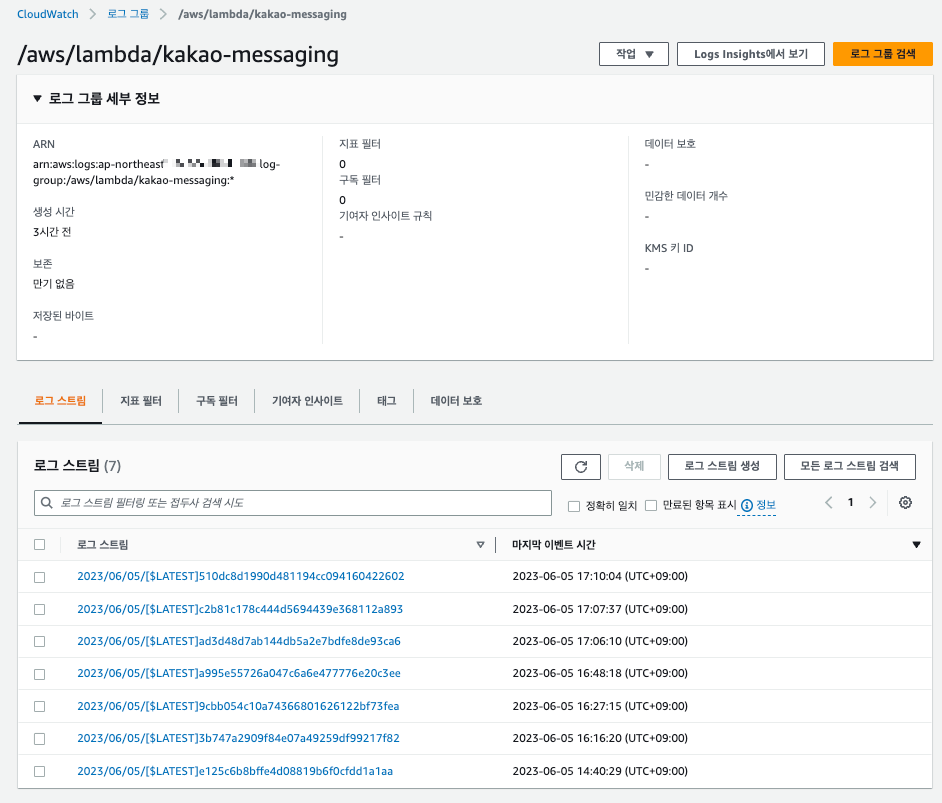
4. Lambda 로그 스트림 확인
Lambda 로그는 CloudWatch에 쌓이고 있습니다. 로그 확인은 모니터링 > CloudWatch 로그 확인에서 확인할 수 있습니다.
NestJS는 효율적이고 확장 가능한 Node.js 서버측 애플리케이션을 구축하기 위한 프레임워크입니다. Express 또는 Fastify 프레임워크를 래핑 하여 동작합니다. (기본으로 설치하면 Express를 사용합니다.) OOP (객체 지향 프로그래밍 Object Oriented Programming), FP (함수형 프로그래밍 Functional Programming) 및 FRP (함수형 반응형 프로그래밍 Functional Reactive Programming) 요소를 결합합니다.
NestJS의 특징
NestJS는 Angualr로부터 영향을 많이 받았습니다. 모듈/컴포넌트 기반으로 프로그램을 작성함으로써 재사용성을 높여줍니다.
IoC(Inversion of Control, 제어 역전), DI(Dependency Injection, 의존성 주입), AOP(Aspect Oriented Programming, 관점 지향 프로그래밍)와 같은 객체지향 개념을 도입하였습니다.
프로그래밍 언어는 타입스크립트를 기본으로 채택하고 있어 타입스크립트가 가진 타입 시스템의 장점을 가집니다.
Node.js는 손쉽게 사용할 수 있고 뛰어난 확장성을 가지고 있지만, 높은 자유도로 인해 Architecture 구성이 어렵습니다. 이러한 단점을 보완하기 위해 NestJS가 탄생하게 되었습니다.
NestJS의 장단점
NestJS는 데이터베이스, ORM, 설정(Configuration), 유효성 검사 등 수많은 기능을 기본 제공하고 있어 편리합니다.
필요한 라이브러리를 쉽게 설치하여 기능을 확장할 수 있는 Node.js 장점도 그대로 가지고 있습니다.
NestJS를 사용하여 개발하면서 느낀 점
러닝 커브가 낮아서 쉽게 접근 가능한 프레임워크인 것 같습니다. 저도 처음에는 영어문서이긴 하지만 문서도 잘 나와있는 편이라서 혼자 문서 보면서 간단한 서비스 만드는 것부터 시작했습니다. (한글문서도 나왔었는데 갑자기 사라짐..) 하지만 아직 사용하는 사람이 많지 않아서 오류 발생 시 찾기가 수월하지는 않습니다. 그래도 점점 Nest를 공부하는 사람들이 많아지는 것 같아서 너무 좋습니다.
그리고 Java의 Spring과 Architecture 구성이 유사하기 때문에 Spring 경험이 있는 분들은 금방 익힐 수 있을 것 같습니다. 다음에는 Spring과 NestJS의 차이점을 들고 오도록 하겠습니다.
getOne(id: number): Movie {
console.log(id);
...
}
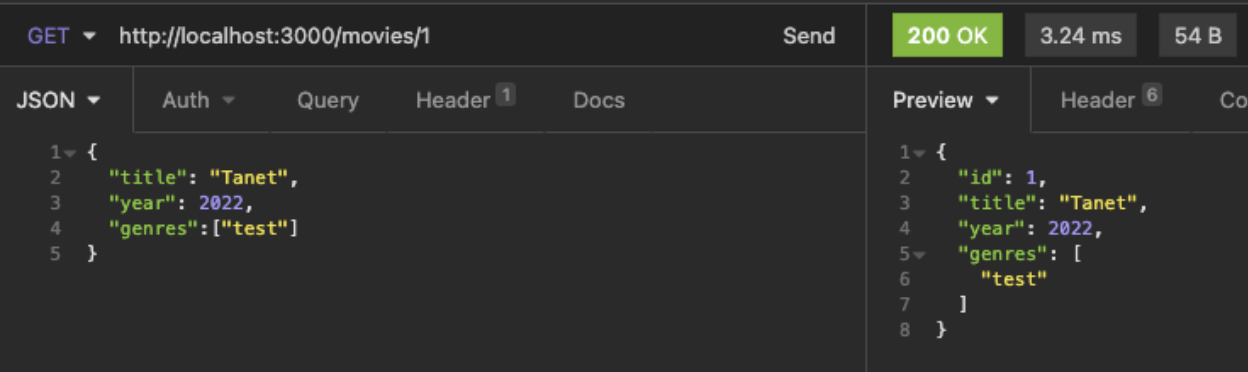
id 값 잘 넘어옴
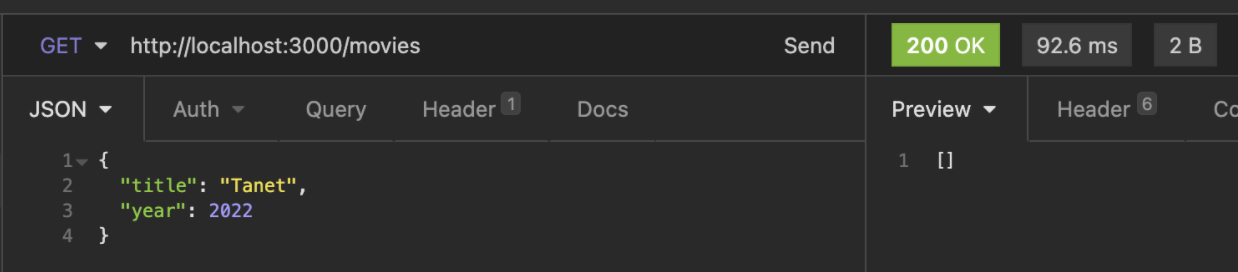
Insomnia에서 확인
빈 배열이 들어간 것을 확인
POST로 데이터를 담고 getOne()으로 테스트합니다.
insomnia 에서는 잘 나옴
💡 근데 테스트할 때는 왜 안 나올까요?
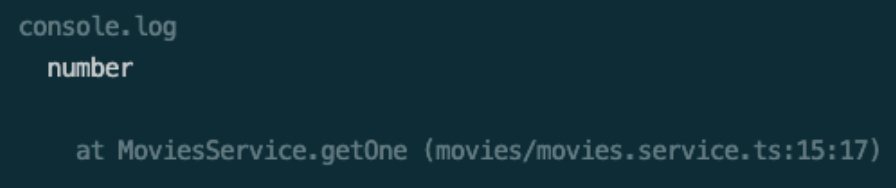
id의 type을 확인해봅니다.
getOne(id: number): Movie {
console.log(typeof id);
... }
number가 나옵니다.
반응형
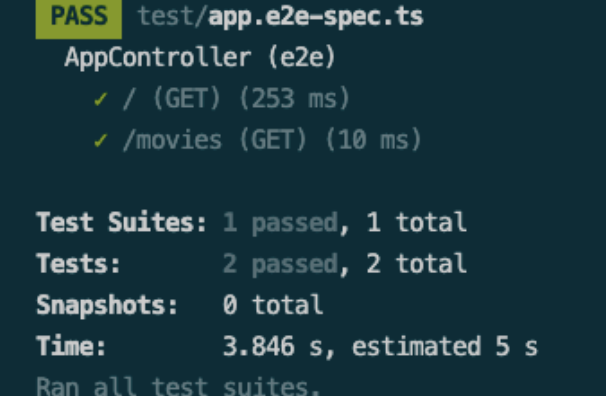
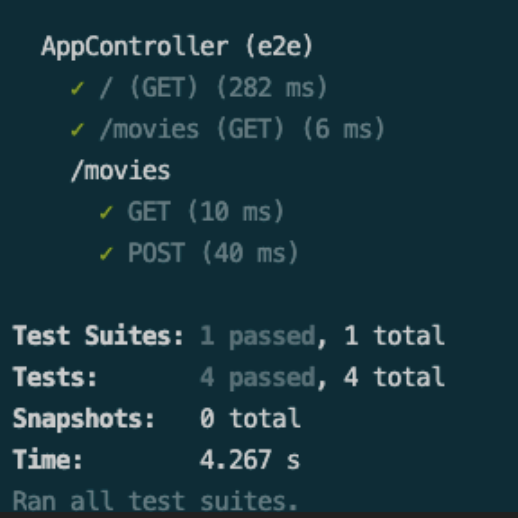
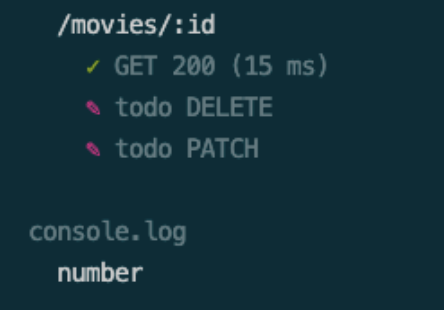
npm run test:e2e로 확인해봅니다.
→ 테스트에서는 string으로 나옵니다.
→ movie.id 는 number이고, id는 string이기 때문에 찾을 수 없다고 뜨는 것
💡 왜 실서버에서의 id는 number이고, 테스트 서버에서는 string으로 나올까요?
main.ts
async function bootstrap() {
const app = await NestFactory.create(AppModule);
app.useGlobalPipes(new ValidationPipe({
whitelist:true, // 아무 decorator 도 없는 어떤 property의 object를 거름
forbidNonWhitelisted: true, // 잘못된 property의 리퀘스트 자체를 막아버림
transform: true, // 실제 원하는 타입으로 변경해줌
}));
await app.listen(3000);
}
transform이라는 것을 넣었습니다.
그래서 getOne()을 호출할 때 id 가 내가 원하는 number 타입으로 변경됩니다.
getOne(id: number): Movie
하지만 문제는 url 은 string입니다.
어떤 이유인지 e2e 테스트에서 transform 이 작동하지 않습니다. → 왜냐하면 e2e 테스트할 때 새로운 앱을 생성을 하는데 어떤 pipe 에도 올리지 않음..
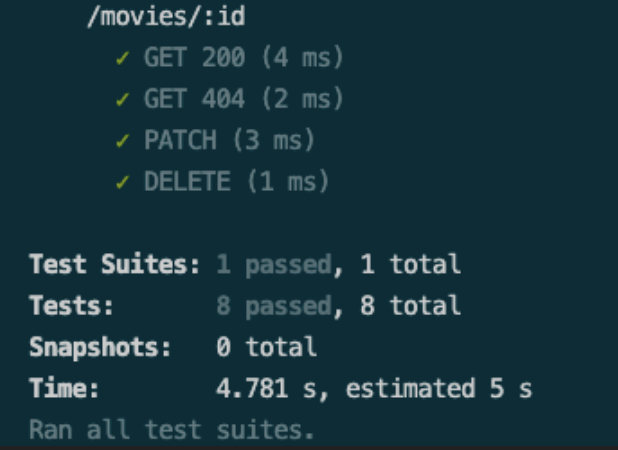
💡 테스트에도 실제 애플리케이션 환경을 그대로 적용시켜줘야 합니다!!
app.e2e-spec.ts
...
beforeAll(async () => {
    const moduleFixture: TestingModule = await Test.createTestingModule({
      imports: [AppModule],
    }).compile();
app = moduleFixture.createNestApplication();
app.useGlobalPipes(new ValidationPipe({
whitelist:true, // 아무 decorator 도 없는 어떤 property의 object를 거름
forbidNonWhitelisted: true, // 잘못된 property의 리퀘스트 자체를 막아버림
transform: true, // 실제 원하는 타입으로 변경해줌
}));
await app.init();
});
...